Neith"s Crafty Creations - image created with Club Scrap DigiDeluxe Refresh and Serengeti Kits
Showing posts with label Kit: 2005/09 Science. Show all posts

Thursday, July 30, 2009

8 Layouts using 10 of Spades ALSB Idea Deck Volume 2

ALSB Idea Deck Volume 2, 10 of Spades layouts by Neith JuchHere is another multiple layout set, this time using the 10 of Spades card from the ALSB Idea Deck Volume 2! Each pair of layouts uses only 4 sheets of 12x12 paper plus 1 sheet of 8.5x11 paper (or three photo mattes)!

VT Cows 10 of Spades ALSB Volume 2 by Neith Juch


Vermont Cows - 10 of Spades Left by Neith Juch
Club Scrap: ALSB Idea Deck Vol 2 - 10 of Spades (left); Mirror Mirror 11/08 - Robin's Egg, Light Celery, Dark Celery; Hybrid Ink Pad - Earth;
Dollar Tree - Foam Alphabet Stickers;

When we visited the Ben & Jerry's factory, in Vermont, the kids couldn't get enough of the cows that were grazing past the flavor graveyard! Luckily we managed to remind them that the fence might be electric before they got too close!

Smart Car 10 of Spades ALSB Volume 2 by Neith Juch


Smart Car - 10 of Spades Right by Neith Juch
Club Scrap: ALSB Idea Deck Vol 2 - 10 of Spades (right); Mirror Mirror 11/08 - Robin's Egg, Light Celery, Dark Celery, Dark Celery Print; Hybrid Ink Pad - Earth;
Scrapbook Takeout: Parisian Vintage Chic 5/08 - Thickers Velvet in Cream;

My son loves spotting cool cars everywhere that we go... yet somehow it took a trip to Montreal to see our first Smart Car on the road! Of course, it was in his favorite color, lime green!

Recycled Wallets 10 of Spades ALSB Volume 2 by Neith Juch


Recycled Creations - 10 of Spades Left by Neith Juch
Club Scrap: ALSB Idea Deck Vol 2 - 10 of Spades (left); Bistro - Tangerine; Science - Topaz Foil Print; Stratosphere - Green; Wheel & Sprocket - Green; Palette Hybrid Ink - Noir Black;
Scrapbook Takeout - Alphabet Stickers;

No, sadly we didn't make these wallets, but we took phoos since we loved them and want to create some! But first we have to start getting paper cartons of milk and juice! These very cool wallets are available to buy in the gift shop at the Montreal Botanical Gardens.

A Perfect Day 10 of Spades ALSB Volume 2 by Neith JuchA Perfect Day 10 of Spades ALSB Volume 2 by Neith Juch

A Perfect Day 10 of Spades ALSB Volume 2 by Neith Juch

A Perfect Day 10 of Spades ALSB Volume 2 by Neith Juch


A Perfect Day - 10 of Spades by Neith Juch
Club Scrap: ALSB Idea Deck Vol 2 - 10 of Spades; Artifacts 2/09 - Paprika Print, Paprika Plain, Dark Aqua Print, Dark Aqua Plain, Light Aqua Plain, Stickers; Palette Hybrid Ink Pad - Noir Black;

My cousins had a blast showing one of their local playgrounds off to my children! We laughed, we swam, we climbed, and we even hunted in the marsh for cattails!

Bridging to Juniors 10 of Spades ALSB Volume 2 by Neith JuchBridging to Juniors 10 of Spades ALSB Volume 2 by Neith Juch

Bridging to Juniors 10 of Spades ALSB Volume 2 by Neith Juch

Bridging to Juniors 10 of Spades ALSB Volume 2 by Neith Juch


Bridging to Juniors ALSB Vol2 10 of Spades by Neith Juch
Club Scrap: ALSB Idea Deck Vol 2 - 10 of Spades; Mirror Mirror 11/09 - Robin's Egg Blue, Light Celery, UM Stamps;
Ranger: Adirondack Pigment Ink Pad - Espresso;
K & Co: Brownie Scrap Pad; Marcella by K - File Folder;

We had such a beautiful bridging ceremony for our troop as the girls progressed to Juniors! They each drew pictures of a favorite Brownie memory and these images, plus photos of the artist during brownie events, were in a slide show right before we called them up to cross them all over! For this layout, I paired up Club Scrap's Mirror Mirror kit with one reversible official Girl Scout print and made just a few extra cuts to help frame the artwork... And added in the printed folder that wasn't part of the Girl Scout line, but matched beautifully! (I've got tiny reprints of the girls' bridging certificates to tuck into the file folder on this layout!)

Easter 2009 10 of Spades ALSB Volume 2 digital layout by Neith Juch


Easter 2009 Digital Layout by Neith Juch
Club Scrap Digital: Memoirs 7/09 - Plain2, Tag01, Tag03, BBFStamp7; Perfect Ten 6/09 - DBG4; Inked Edges Volume 1 - 4x5, 4x6c, 8x10a, 12x2, 12x12a, 12x12c;
PSE: Altered Hues/Saturation, Layer Blending Modes, Opacity;

This layout is indeed digital, but, by using transparent papers you can create a similar layout! I loved the quiet colors in the main photo and wanted to really set it off, so I took it a step further by creating three layers of the same photograph and desaturated a top layer of the photo, then used the Screen layer blending mode on that layer... then I used the Multiply layer blending mode on the middle layer and adjusted the top two layers' opacity and color until I was satisfied. Then I applied the same effects to the smaller images that share one matte.


10 of Spades ALSB Volume 2 Layouts by Neith Juch

Sunday, July 5, 2009

9 More Layouts, 1 Formula, 3 of Clubs

What else can you get when you combine 4 sheets of paper, 2 mattes/another sheet of paper, and one ALSB Idea Deck Card? Plenty more great layouts, of course! Here are 9 layouts that I created using the 3 of Clubs card from the ALSB Idea Deck Vol. 2! (Check out the ALSB, Assembly Line ScrapBooking, definition to the right!)

Montreal Mall 3 of Clubs Left by Neith JuchMontreal Mall 3 of Clubs Right by Neith Juch

Montreal Mall 3 of Clubs Left by Neith Juch

Montreal Mall 3 of Clubs Right by Neith Juch


Club Scrap: ALSB Idea Deck Vol 2 - 3 of Spades; Matrix - Red Print; Cruisin' - Black; Science - Topaz Foil Print; Artifacts - Sky Blue;
Scrapbook Takeout - Red Felt Thickers;

We're still not quite sure what these people-cutouts, 80s themed workout photos, and cell phones have to do with one another, but the girls had a blast playing in the cutouts at the Montreal mall! The original ALSB design sandwiches 3 small mattes and thin strips together, but I like the thin strips to spread out a bit and to leave the three adjacent mattes uncut, for now!

Crochet Produce Bags, 3 of Clubs right by Neith Juch


Club Scrap: ALSB Idea Deck Vol 2 - 3 of Clubs (right); Common Threads 3/09 - Teal; Avant Garde 3/08 - Green; Fizzin' Blue 2008 - Green Print; Stratosphere 4/07 - Dark Blue Print, Stickers;
Scrapbook Takeout: Wonderland 3/09 - Fancy Pants Felt Shapes, KI Memories Chipboard Shapes, Punchinella Ribbon;

I have fallen head over heels for this Crochet Grocery Bag Pattern By Haley Waxberg! It's a simple combination of single crochet, chain, and slip stitches to create a wonderfully stretchy netted produce/shopping bag. I altered the pattern, just a little, in between the increasing rows, I did one less row than called for and did 12-14 of the ch5 rows as the main body.. also, I thickened my straps a little and used 100% cotton by Lily and by Bernat.

I combined the photo with some coordinating papers, earthy embellishments, and the fun punchinella ribbon, that reminds me of the bag's open pattern. I love drawing my color scheme from my photographs and really enjoy mixing and matching papers from different kits to do so! Having a handmade swatch ring of my Club Scrap cardstock is invaluable for this style of scrapping!

Montreal Gargoyles, 3 of Clubs Left Digital Layout by Neith Juch


Club Scrap: ALSB Idea Deck Vol 2 - 3 of Clubs Left; A Study in Red Digital Kit 1/08; Milestones 12/09 Digital Kit; Digital Inked Edges Vol 1;

One of the great things about digital scrapbooking is that you can easily create 12" wide panoramic photographs without any extra expenses! Another great thing is that when you adore the rich texture of a Club Scrap paper you can go ahead and zoom in on it to really emphasize the pattern in your digital layouts!

Boston Childrens Museum 2003, 3 of Clubs by Neith JuchBoston Childrens Museum 2003, 3 of Clubs by Neith Juch

Boston Childrens Museum 2003, 3 of Clubs by Neith Juch

Boston Childrens Museum 2003, 3 of Clubs by Neith Juch


Club Scrap: ALSB Idea Deck Vol 2 - 3 of Clubs; Great Outdoors 10/07 - Mushroom, Green Text Weight Print, Light Green, Dark Green, Dark Green Print, Light Green Tags; Hybrid Ink Pad - Earth;

Adding a lightly inked edge really helps distinguish one piece of paper from another and helps maintain the illusion of 12" long strips hiding under an overlapping matte. Just remember not to ink the edge that is hidden under or alongside the matte!

Bridge, 3 of Clubs Right by Neith Juch


Club Scrap: ALSB Idea Deck Vol 2 - 3 of Clubs Right; Bridges Digital Kit 2/08 - CS03; Great Outdoors 10/07 - CS01, CS02, CS08; Refresh Digital Kit 2/07 - PLtBlue1; Farmer's Market Digital Kit 10/06 - CSBrown;

When working with digital scrapbooking, never be afraid to alter the hue of your elements to make them coordinate with your layout! For this layout, I loved the printed wooden bridge from the Refresh kit, but the color would have completely clashed with my layout... so I used Ctrl-U to alter the hue, saturation, and brightness of the print until it blended perfectly with my layout!

Peabody Essex Museum Owl Sculpting, 3 of Clubs Left by Neith Juch


Club Scrap: ALSB Idea Deck Vol 2 - 3 of Clubs; Let Me Count the Ways Digital - Paper; Mirror Mirror Digital - Paper, Transparencies, Digital Font;

I took full advantage of digital scrapbooking in order to copy random stripes from the transparency overlay image to create borders for my photographs and "paper" strips. With the outline nature of the Mirror Mirror font images, it was easy to cut and paste some of the digital cardstock into the text to help continue the style. I also just loved how the patterns on these two prints combined in both pattern and color scheme.

Montreal Botanical Garden, 3 of Clubs Right by Neith Juch


Club Scrap: ALSB Idea Deck Vol 2 - 3 of Clubs Right; Pure & Simple 4/09 - Digital Kit; Digi Inked Edges Vol 1;

With digital kits you can always play with the transparency levels of your different layrs and use any color of paper as an overlay to retint a patterned paper that is underneath it. For this layout I took a nearly grayscale background paper and tinted the lighter areas green by layering up a green cardstock image over it with the overlay style. I also retinted some of the paper from lime green into a deep purple to coordinate with the flowers to try to maintain the color scheme of the photograph.

3 of Clubs, ALSB Idea Deck Volume 2


Of course, I couldn't leave you without a quick glance at the basic design for this layout formula! When you create your page, never fear to move your elements around and alter the cuts slightly to fit your needs!

Tuesday, June 24, 2008

Book Of Me, Blog Alerts, and More!

I have two different things to share today :) One is a trio of new creations from this week, the other is an exciting new option for viewing my blog!

Now, you can subscribe to my blog! By entering your email address you can get automatic emails, instant messages, etc whenever I add a new blog post!

Your email address:


Powered by FeedBlitz


This week I've been working on some layouts about my own life as part of Club Scrap's PSL Camp Challenges, beginning to work on a series of challenges based on Bernie Berlin's Artist Trading Card Workshop book, and had a card to make for my son's birthday! Here are two of the layouts and a card that combines the ATC workshop and my son's card.. plus one other layout for my Book of Me that I made earlier in the month!

Camp

Club Scrap: Rhapsody 3/05 - Cream Plain; Farmer's Market 10/06 - Leaf Plain; Egyptian 8/03 - Gold Plain;
Scrapbook Takeout: Eclectica 6/08 - American Crafts Journaling Stickers, Maya Road Stitched Ribbon, Heidi Swapp Felt Flowers;
American Crafts: Galaxy Marker - Purple Nebula;
K&Co: Kimberly Hodges - Red Multi Striped Flat Paper 643077 639546;
Sizzix: Alphabars - Ransom;
Unknown: Fibers;

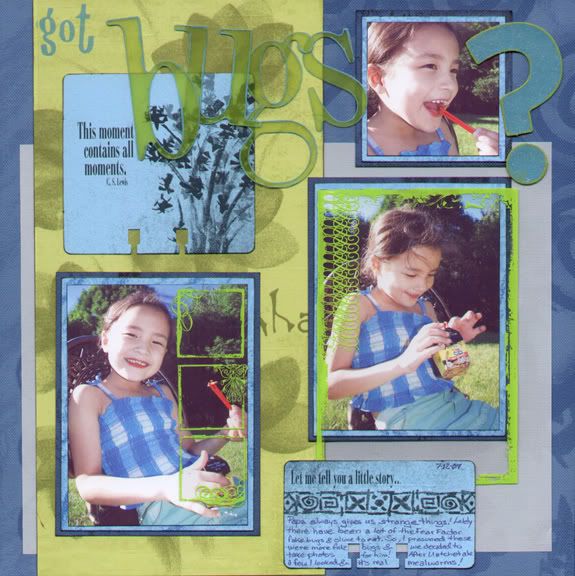
Science Fair 1990

Club Scrap: Bridges 2/08 - Brown Plain; Science 9/05 - Gold 8.5x11 Print, Transparent Overlay;
Scrapbook Takeout: Tell Your Story 3/08 - Jenny Bowlin Die Cut Sticker;Celebrations 12/07 - 7 Gypsies Photo Turns; Wonderful Whimsy 6/07 - American Crafts Felt Punctuation; Journal Jammers 4/06 - Heidi Swapp Chipboard Alphabet, 7 Gypsies Gaffer Tape;
Zig: Writer - Chocolate;
Unknown: Decorative Brads;

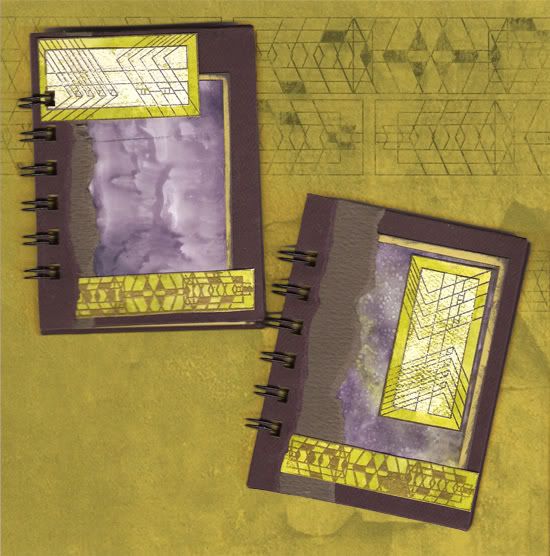
Intuitive Bug Card

Scrapbook Takeout: Eclectica 6/08 - American Crafts Treehouse Chipboard Shapes, Maya Road Stitched Ribbon,
Club Scrap: A Study in Red 1/08 - Red; Be Still 9/07 - Yellow; Collections 6/06 - UM Font; Salsa 10/03 - White;
Artist Trading Card Workshop by Bernie Berlin: Intuitive Watercolor;
Darice: Kid Concoctions - Liquid Watercolor Hot Colors;
Niji: Waterbrush;
Stewart Superior: Palette - Noir Black;
Zig: Millennium - Pure Black;

The Tropics

Scrapbook Takeout: Parisian Vintage 5/08 - 7 Gypsies 97% Complete Flashcard Sentiments, Maya Road Trinkets Velvet Sparkle Blossom, Manila Tag;
Club Scrap: Simply Beautiful 5/07 - Green Print, Tan Plain;
Ranger: Distress Crackle Paint - Antique Linen;
Zig: Writer - Denim;

Wednesday, June 13, 2007

Hawaiian Luau Invitations (4 Technique Junkies Techniques!)

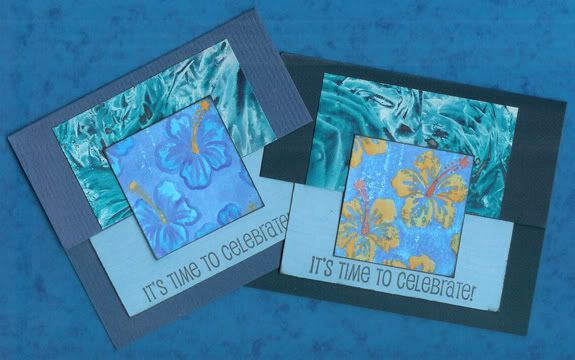
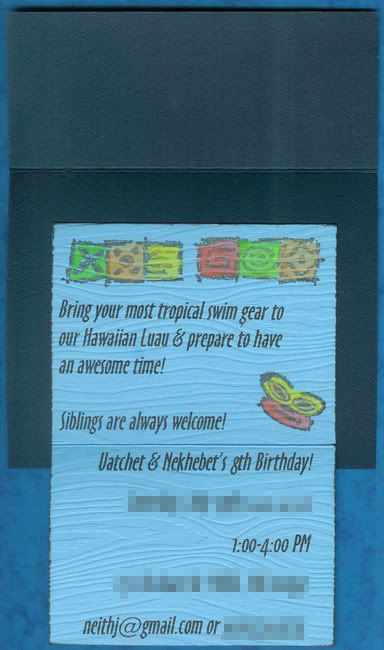
I've been busy getting ready for the end of the school year and for my children's birthday parties! Here are the invites that we just made for the girls' Hawaiian Luau Party (thank you so much to Vernell for helping me finish them up today!)

Hawaiian Luau Invitations

These cards use a wonderfully dynamic structure based on Flap Fold Card from the Technique Junkies June/July 2007 Newsletter! The structure helped me by using small papers (didn't want to tear through all my nice 8.5x11 or 8.5x5.5 pieces for mass inviting!) including one 5x7, one 4x6, 1/3 of a 4x6, and 1/2 of a 3x5 POP from Club Scrap per card with a few spare scraps to make ATCs with!

Hawaiian Luau Invitations

For the ocean wave-like pattern, I used the Cling and Scrunch technique from the Technique Junkies June/July 2007 Newsletter, using the Color Washes and Club Scrap's glossy Asian Artisan 1/04 Blue Frost paper. For the Hibiscus square, I used the AquaPainted Rubber AND the Watercolor Crayon Painting techniques from Technique Junkies' Free Watercolor Crayon Tutorial samples along with the gorgeous Surf's Up! 7/06 CSt Hibiscus Collage WM Stamp. This stamp creates the blue, fabric-like, background and leaves the flowers as a negative image, perfect for painting in with other colors!

I would highly recommend joining Technique Junkies if you enjoy inking techniques! Every other month you receive a wonderful full color newsletter filled with different stamping and inking techniques. Online, as a subscriber, you can also access more step by step images and descriptions, a wealth of additional sample images, bonus online techniques, and accress to their yahoo group filled with plenty of tips, samples, challenges, and more! All for only $3 per issue with unlimited online access to those issues' web pages (you can only access the pages for the months where you've subscribed)!

Supplies Used:
  • Club Scrap: Surf's Up! 7/06 CSt Hibiscus Collage WM Stamp and Blue paper; Stratosphere 4/07 Light Blue paper; Farmer's Market 10/06 Blue Paper; Science 9/05 Sapphire Paper (to scan on top of); Textiles & Notions 9/04 Stewart Superior Palette Noir Black Ink Pad; Asian Artisan 1/04 Blue Frost paper; Evergreen Blue 12/03 paper; Polynesian 7/01 B&B UM Stamps; Party Pack 2006 UM Stamps; Niji Waterbrush;
  • Ranger: Adirondack Color Wash in Denim and Stream;
  • Staedtler: Karat Watercolor Crayons;
  • Technique Junkies: June/July 2007 Cling and Scrunch and Flap Fold Card; Online Free Watercolor Crayon Techniques;

Saturday, May 5, 2007

Retreat Layout: Celebration of Womanhood Weekend

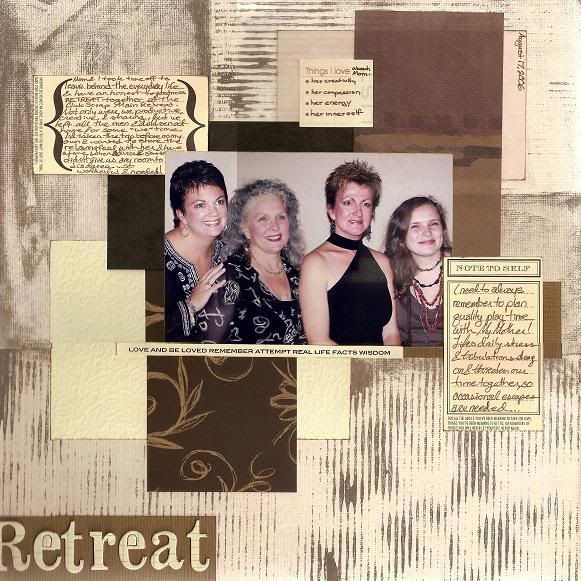
I'll have to tell you all more about this layout a little later and replace it with a smoother scan! (Away from home and without my regular software/scanner or sleep at 1AM!) But I wanted to quickly share a layout that I did tonite as part of my Celebration of Womanhood Weekend Banquet!

I handed out a sheet to my students (a wee, small class, but I have a few raindates for it!) that were aimed at helping you write about an important woman in your life... a bond with them, emotions, or even to document their life. Here's my little contribution! A page about my mother and I escaping the everyday life and running off to the Club Scrap Main Retreat together last year! (Much more to come about that later!)

Retreat Layout by Neith, mixed Club Scrap Kits and Scrapbook Takeout April 2007 Kit

Club Scrap: Color In Black and White 4/06 Land Print; 3/07 Rhapsody Cream; Ivory Elegance 12/06 Dark Brown Print & Light Brown Plain; Collections 6/06 Saddle Brown Print; Science 9/05 Ebony Plain; Chocolate Shoppe 2/05 Ivory Press;

Scrapbook Takeout 4/07 Kit: Heidi Swapp Newsprint Ledger Chipboard Alpha; 7 Gypsies 97% Complete Tags Parenthesis and Note to Self; 7 Gypsies 97% Complete Document Stickers;

Ranger Archival Coffee Ink Pad; Zig Brown Memory Writer;

Inspired by Francine's "Finding My Groove" Layout

Thursday, March 15, 2007

Distress Ink Monoprinted Bookmarks by 1st Graders!

These bookmarks were created by my daughters' First Grade class! Each of the kids selected one color of my Club Scrap Cardstock Pieces first, then some stamps, and together we selected the ink colors, in the end, using nearly the complete line of Ranger's Distress Inks! We pressed each ink color on my Ranger Non Stick Craft Sheet and then misted the inks with water before the kids' pressed their glossy paper into the inks, then swirled, swiped, bent and striped it, etc until they were satisfied! (I helped cover a few white spots for them.) Then we ran adhesive across the backs of the inked paper and stuck them right down onto the Non Stick Craft Sheet and stamped over the papers with Ranger's Waterproof Archival Inks and Club Scrap Stamps! Then, while each child cleaned their fingers, I adhered the inked papers to the cardstock, laminating them all at home!

Club Scrap/Ranger Distress Monoprinted Bookmarks by Ms Theodore's 1st Grade Class
Club Scrap/Ranger Distress Monoprinted Bookmarks by Ms Theodore's 1st Grade ClassClub Scrap/Ranger Distress Monoprinted Bookmarks by Ms Theodore's 1st Grade Class

They did such a beautiful job! Each child selected one bookmark to keep and one to contribute to the Class Auction Project! They also each made Japanese Stab-Bound Mini Books last week and I'm going to bind one Writing Workshop story per child, with about the author pages, into a Hand Stitched Journal. Along with all of these handmade goodies, parents are contributing towards storebought books and book related items, some additional handmade surprises, and an unfinished wood nightstand bookcase! Rocky's Ace Hardware of Millis is also donating the winner's choice in colors for one quart of paint or stain and advice to complete the bookcase!

I've also donated a complete Mini Kit For a Cause Handmade 6"x6" Postbound Scrapbook with ALSB Layouts (ready-for photos) and accompanying cards, stamps, stencil, and more! This will be a separate auction item!

I've had such a blast working with the kids in the classroom, and especially loved the enthusiasm from some of the boys... including the extra twinkle when one worked with purples and pinks! So adorable!

I will also be making bookmarks (die cut shapes and possibly this same ink technique as separate options) at the Millis Girl Scouts Craft Expo on March 25th! It will be from 12:30-3:00PM at the Church of Christ, with a $2 entry fee for adults (children under 19 are free!), with plenty of crafts to make and buy as well as a full concession stand to benefit the Girl Scouts of our town! (We will even have extras of my daughter's homemade GS Cookie Inspired Chocolates for sale at our booth! Mmmmmmm!!)

Saturday, March 3, 2007

Working With Children... What Keeps Me Busy!

The start of March is filled with children's projects that keep this mother very busy! First, we finished up my son's Pinewood Derby Car, without any scrap-supplies! Then we moved onwards to making Japanese Stab Bound Books with 1st Graders in my daughters' classroom... And now, we're hard at work finishing up mini chocolates to give in thanks to our Girl Scout Cookie Customers!

Japanese Stab Bound Books by 1st Graders, Club Scrap Papers

These lovely books were all made by 1st Graders! I used my handy, dandy Club Scrap POPs, some jewelry cord from Walmart, and some bargain-bin ribbon to set up small kits for the kids to choose from. I had already prescored the covers and the thicker pages with my ScorIt, using Club Scrap Cardstock, copy paper, envelopes, paper bags, and lined paper as the pages. The kids pressed all the folds with a bone folder and then stacked and clamped the pages together while I made the holes. My daughters helped me show the binding technique and each child bound their own!

Clockwise, from the top left, the papers used are: Wild Wild West 10/05 Terra Cotta with paper bag pages; Fossils 8/04 Kraft Print with a miniature lined notebook inside; Musical Interlude 12/05 Ochre with manila envelope pocket-pages; Retro 9/06 Dark Raspberry; Science 9/05 Amethyst with Chocolate Shoppe 2/05 pages; Let Me Count the Ways 2/06 Dark Cherry with lined paper pages; County Fair 7/04 Red; Wheel & Sprocket 8/06 Purple with lined paper pages; Surf's Up! 7/06 Light Green with copy paper pages;


Uatchet Making Caramel deLite Flavored ChocolatesToday, the girls are hard at work making a pair of miniature chocolates for approximately 70 families who ordered Girl Scout Cookies through us! (They sold 226 boxes in just 3 days, with Mimi helping out with 50 of those boxes through her friends!) Each family will get a pretty little tag that lists their order and thanks them, along with one Caramel deLites (aka Samoas) flavored chocolate and one Thin Mints flavored chocolate! I have to say that they are beyond delicious!

The Caramel deLites include a milk chocolate shell then a small dollop of caramel. On top of that are some toasted coconut shreds and crushed GS Shortbread cookies! Then they are sealed with another coating of milk chocolate, et voila! The Thin Mints are made from a thick layer of mint flavored dark chocolate, a thin layer of dark green colored white chocolate, and a final layer which mixes milk chocolate and crushed chocolate cookies! (Make sure that you seek out the harder style cookies for that!)

The girls started singing my praises when they tasted the chocolate! "Oh, Mommy, you have such great ideas! You make the yummiest chocolate recipes!" I had to blame it on the delicious flavors of the Girl Scout Cookies that we just copied!

Caramel deLites Flavoed Chocolates, Waiting to be Wrapped!

We promise to share more photos later! There will be at least 19 books that are part of the classroom contribution to our school's auction! Plus we'll have photos of the wrapped chocolates and the Thank You tags! Stay tuned!

Friday, February 23, 2007

Monoprinting: a great way to have bursts of color on your work!

Monoprinting with the Ranger Non Stick Craft SheetClub Scrap Painted Desert and Road Trip Kits

When I first was reading about this technique, with its proper name, it involved using specialized monoprinting sleeves... I improvised by using a pair of write on transparencies. But, I have since learned that it is soooo much easier to use the Ranger Non Stick Craft Sheet (which I already use every time I ink and glue)!

The ATC, in the right hand image above, was created with the transparencies, Club Scrap 3/05 Road Trip White Paper, Club Stamp 5/05 Painted Desert Unmounted Stamps, Ranger Black Pigment Ink & Black Embossing Powder (the edges of the ATC are inked and embossed also), and ColorBox Ancient Page Harbor, Lime, & Neptune Inks. I applied inks to the paper by dripping reinkers, one color onto the papers at a time, onto a transparency and used the ColorBox Stylus to spread it out, then sandwiched a blank transparency on it and pressed unevenly. I then spritzed the side of the transparency that I was using with the Ranger Perfect Ink Refresher and laid the cardstock onto the damp transparency. I sandwiched the transparencies again and used a brayer to press the ink into the paper. I then repeated the process with the darker ink.

Club Scrap 2/07 Refresh Club Stamp KitBasically you can press Ink Pads onto the craft sheet, drip and drizzle Reinkers on it, pounce ink on, smear glitter glue onto it, add Paints, drip or draw onto it with Alcohol Inks, dilute with Alcohol Blending Solution or even spritzes of water (for water based inks) and then take your intended project surface and press it onto the inks, swirl or swipe as you lift and marvel over the finished piece! You can also press portions of the Non Stick Craft Sheet onto itself before adding the inks to your project to get more of an ink blot effect! Glossy Paper is wonderful for this technique, but anything will do! The glossy surface just helps the ink travel and fills the paper better.
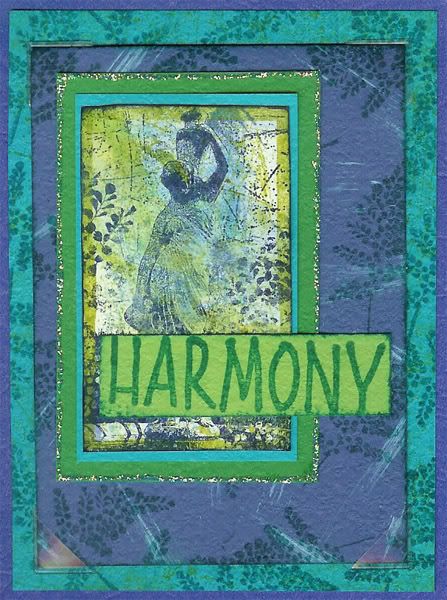
In the ATC to the right and in the title image for this Blog entry, I used a combination of Ranger Alcohol Inks in Lettuce & Stonewashed, Ranger Alcohol Blending Solution, and Ranger Stickles in Waterfall to create a backdrop for the stamped scratch marks, frame, and focal image. On the ATC, I used also Ranger's Aqua Adirondack Paint Dabber, Adirondack Bottle, Lettuce, & Stonewashed Ink Pads, and Archival Cobalt & Teal Ink Pads as well as Club Scrap's Glossy Paper plus the 2/07 Refresh Kit's CSt UM Stamps, CSt WM Statue & Fern Collage Stamp, Dark Blue, Light Blue, Dark Green, and Light Green Papers.

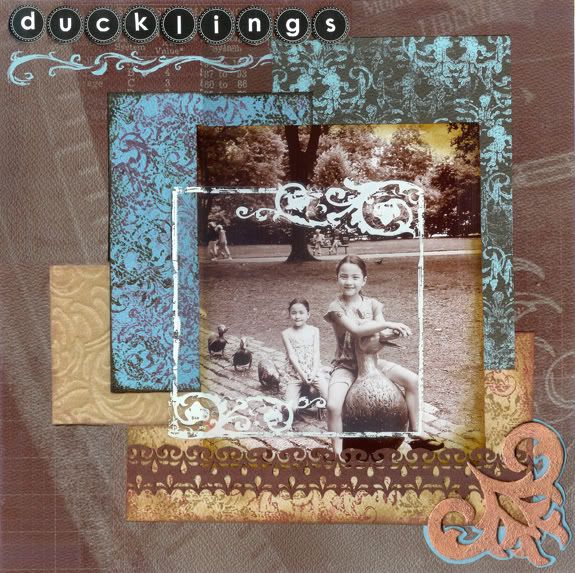
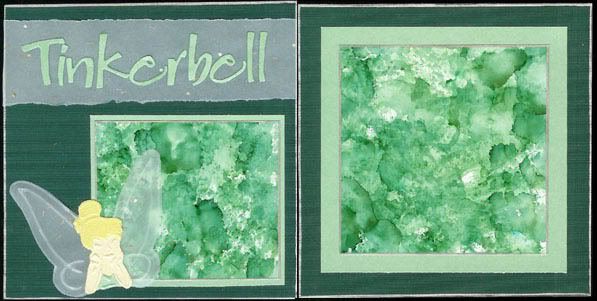
The mattes in the layout below were created with Glossy Paper and Alcohol Inks using a combination of monoprinting and direct pouncing with Alcohol Inks. I dry embossed Tinkerbell with a Plaid Embossing Stencil. The papers are all Club Scrap, using the Mint Frost and Cream Frost from the 1/04 Asian Artisan Kit, and unfortunately unlabelled other CS papers. (I didn't post details in the past!)

Club Scrap

Below is another sample made with alcohol ink monoprinting, as you can see in the upper right, eventually the colors will blend all the way, simply soak it up and add new inks! I misted rubbing alcohol onto the Glossy Paper and onto the craft mat, dripping Alcohol Inks at random. Then I laid the Glossy Paper face-down on the inked mat and swirled, swiped, and lifted. I used Club Scrap's 9/05 Science Unmounted Stamps, 7/05 Wings Apricot Paper, and Glossy Paper along with Ranger's Non Stick Craft Sheet, Adirondack Alcohol Inks in Butterscotch, Caramel, & Terra Cotta, and Adirondack Ink Pads in Butterscotch, Caramel, Rust, & Terra Cotta.

Club Scrap 9/05 Science Kit and 7/05 Wings Kit

Below is the new logo for my tutorials at Diversity Designs! I applied small "spatters" of Ranger's Alcohol Inks in Bottle, Lettuce, and Stream to the Ranger Non-Stick Craft Mat, added the Alcohol Ink Blending Solution, then took Glossy Paper and pressed it onto the sheet, swirling and lifting until the paper was well covered. I added more ink and targeted the white areas. After the paper was filled with ink, I added a little Adirondack Metallic Mixatives in Copper to a felt applicator and pounced away! The black art work is a self portrait of me that was then altered by Roselyn!

Ink Splatters Banner, Created With Alcohol Inks

Tim Holtz also teaches a version of this with his Distress Inks and calls it Wrinkle Free Distressing. With it, you will often spritz the craft sheet or your project material with water and then iron your finished piece to keep the wet work from warping. Ranger has posted one project with instructions for a Monoprint Card plus Distress Ink Tips. Pennywise Arts has a great online class on Monoprinting with Alcohol Inks.