

When I first was reading about this technique, with its proper name, it involved using specialized monoprinting sleeves... I improvised by using a pair of write on transparencies. But, I have since learned that it is soooo much easier to use the Ranger Non Stick Craft Sheet (which I already use every time I ink and glue)!
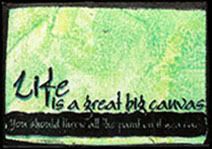
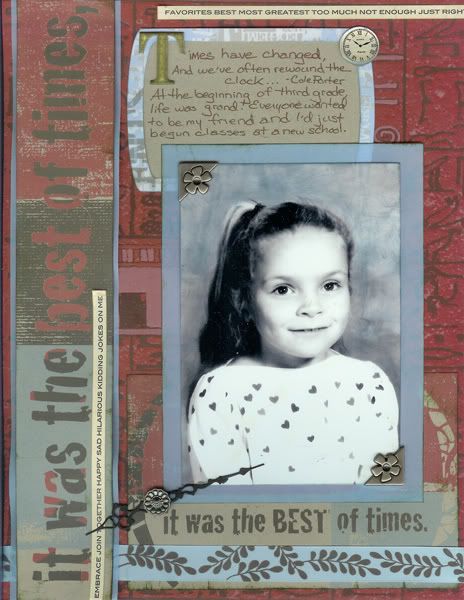
The ATC, in the right hand image above, was created with the transparencies, Club Scrap 3/05 Road Trip White Paper, Club Stamp 5/05 Painted Desert Unmounted Stamps, Ranger Black Pigment Ink & Black Embossing Powder (the edges of the ATC are inked and embossed also), and ColorBox Ancient Page Harbor, Lime, & Neptune Inks. I applied inks to the paper by dripping reinkers, one color onto the papers at a time, onto a transparency and used the ColorBox Stylus to spread it out, then sandwiched a blank transparency on it and pressed unevenly. I then spritzed the side of the transparency that I was using with the Ranger Perfect Ink Refresher and laid the cardstock onto the damp transparency. I sandwiched the transparencies again and used a brayer to press the ink into the paper. I then repeated the process with the darker ink.
 Basically you can press Ink Pads onto the craft sheet, drip and drizzle Reinkers on it, pounce ink on, smear glitter glue onto it, add Paints, drip or draw onto it with Alcohol Inks, dilute with Alcohol Blending Solution or even spritzes of water (for water based inks) and then take your intended project surface and press it onto the inks, swirl or swipe as you lift and marvel over the finished piece! You can also press portions of the Non Stick Craft Sheet onto itself before adding the inks to your project to get more of an ink blot effect! Glossy Paper is wonderful for this technique, but anything will do! The glossy surface just helps the ink travel and fills the paper better.
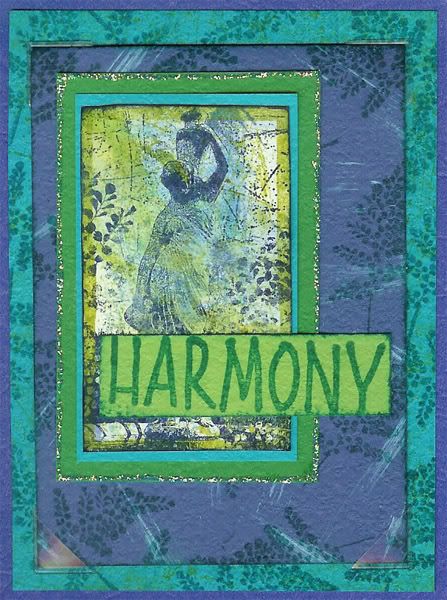
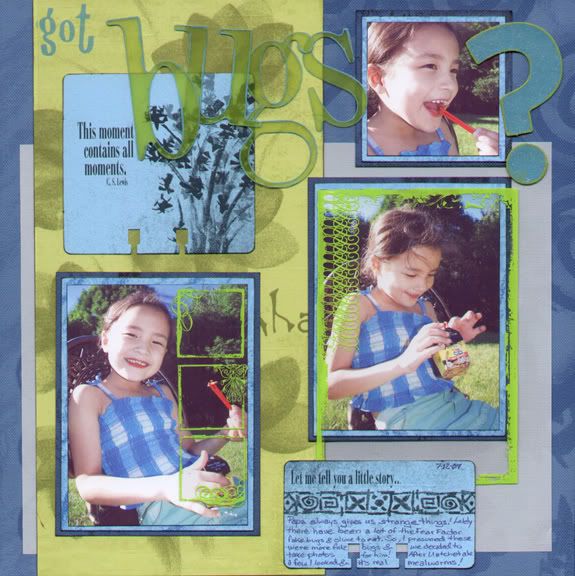
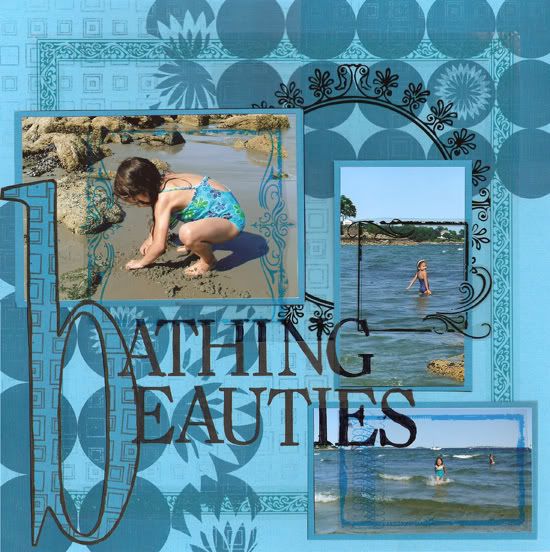
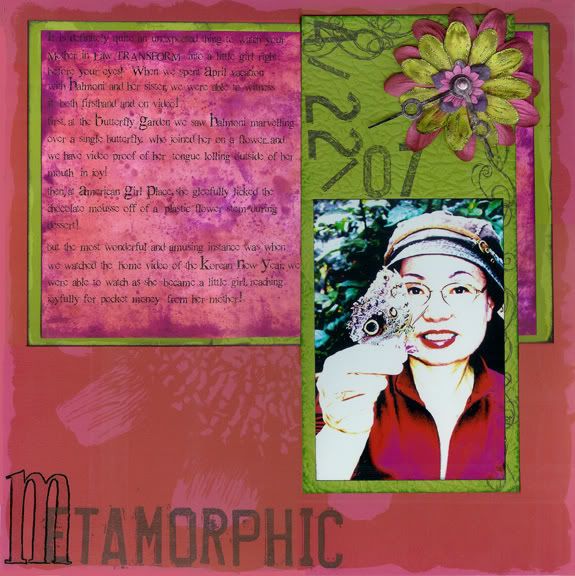
In the ATC to the right and in the title image for this Blog entry, I used a combination of Ranger Alcohol Inks in Lettuce & Stonewashed, Ranger Alcohol Blending Solution, and Ranger Stickles in Waterfall to create a backdrop for the stamped scratch marks, frame, and focal image. On the ATC, I used also Ranger's Aqua Adirondack Paint Dabber, Adirondack Bottle, Lettuce, & Stonewashed Ink Pads, and Archival Cobalt & Teal Ink Pads as well as Club Scrap's Glossy Paper plus the 2/07 Refresh Kit's CSt UM Stamps, CSt WM Statue & Fern Collage Stamp, Dark Blue, Light Blue, Dark Green, and Light Green Papers.
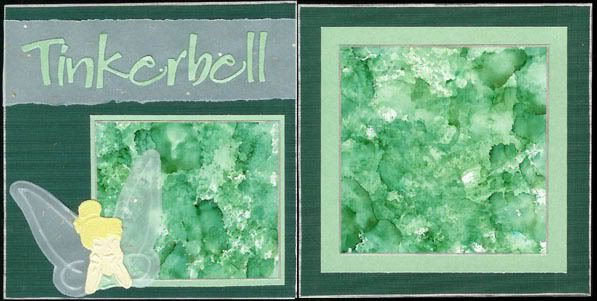
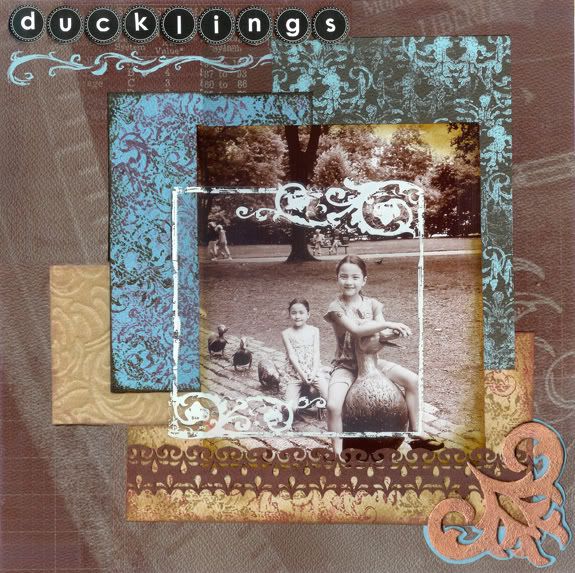
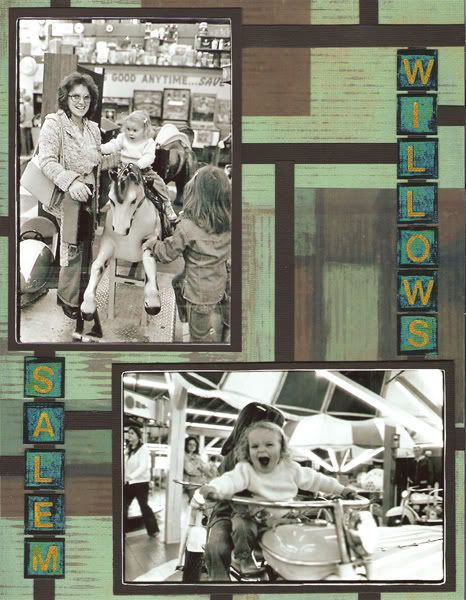
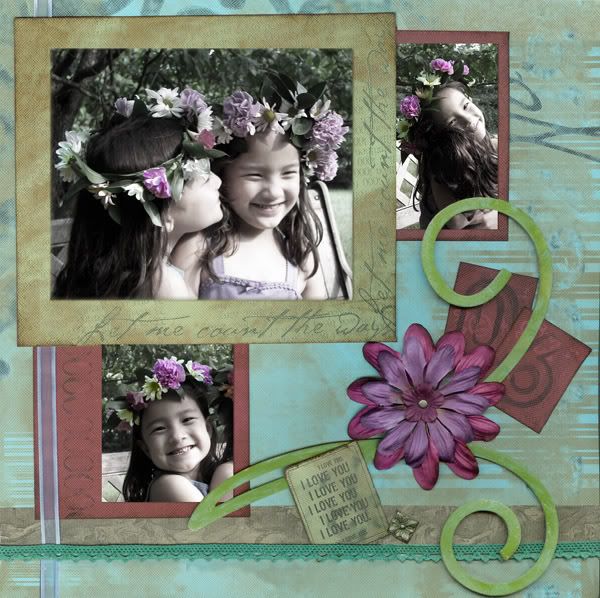
The mattes in the layout below were created with Glossy Paper and Alcohol Inks using a combination of monoprinting and direct pouncing with Alcohol Inks. I dry embossed Tinkerbell with a Plaid Embossing Stencil. The papers are all Club Scrap, using the Mint Frost and Cream Frost from the 1/04 Asian Artisan Kit, and unfortunately unlabelled other CS papers. (I didn't post details in the past!)
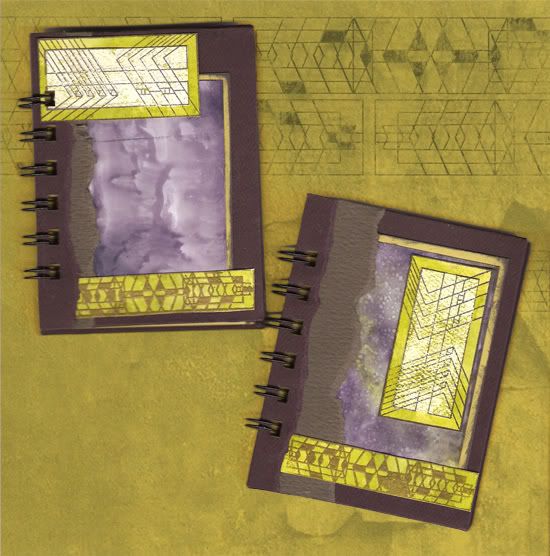
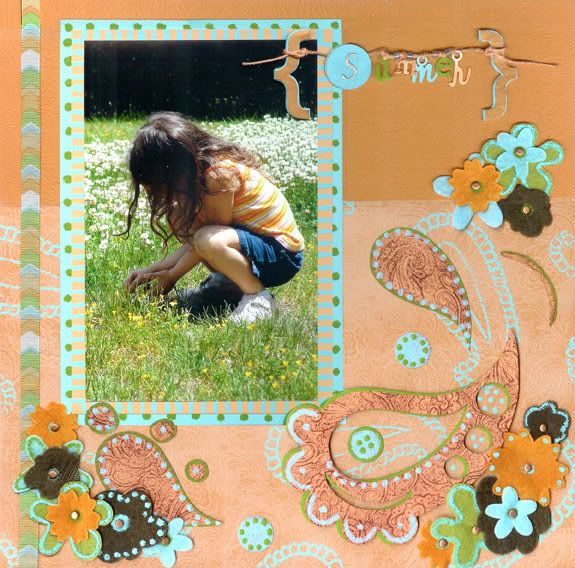
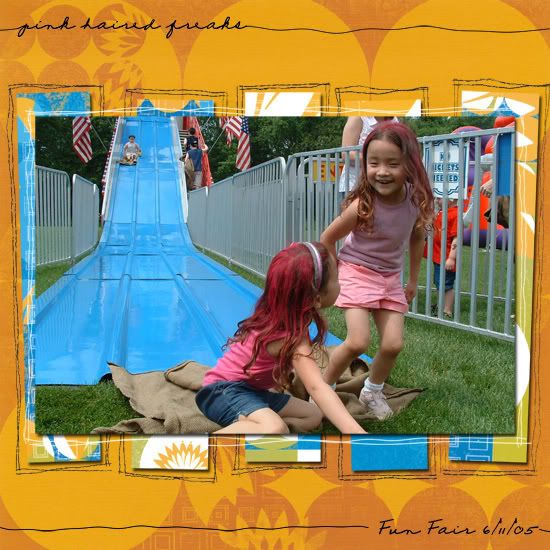
Below is another sample made with alcohol ink monoprinting, as you can see in the upper right, eventually the colors will blend all the way, simply soak it up and add new inks! I misted rubbing alcohol onto the Glossy Paper and onto the craft mat, dripping Alcohol Inks at random. Then I laid the Glossy Paper face-down on the inked mat and swirled, swiped, and lifted. I used Club Scrap's 9/05 Science Unmounted Stamps, 7/05 Wings Apricot Paper, and Glossy Paper along with Ranger's Non Stick Craft Sheet, Adirondack Alcohol Inks in Butterscotch, Caramel, & Terra Cotta, and Adirondack Ink Pads in Butterscotch, Caramel, Rust, & Terra Cotta.

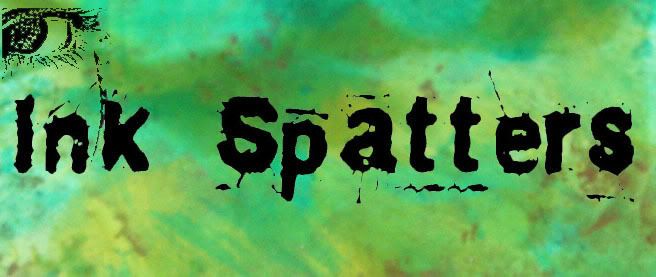
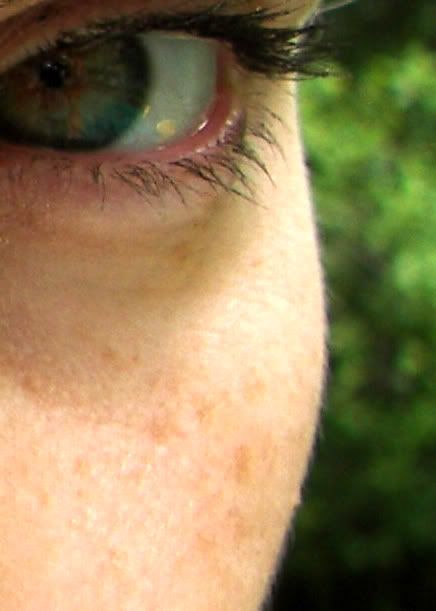
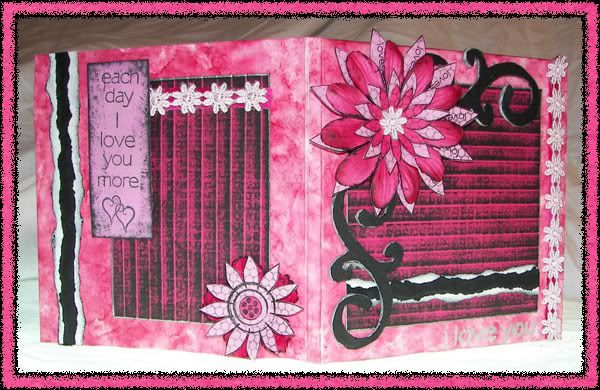
Below is the new logo for my tutorials at Diversity Designs! I applied small "spatters" of Ranger's Alcohol Inks in Bottle, Lettuce, and Stream to the Ranger Non-Stick Craft Mat, added the Alcohol Ink Blending Solution, then took Glossy Paper and pressed it onto the sheet, swirling and lifting until the paper was well covered. I added more ink and targeted the white areas. After the paper was filled with ink, I added a little Adirondack Metallic Mixatives in Copper to a felt applicator and pounced away! The black art work is a self portrait of me that was then altered by Roselyn!
Tim Holtz also teaches a version of this with his Distress Inks and calls it Wrinkle Free Distressing. With it, you will often spritz the craft sheet or your project material with water and then iron your finished piece to keep the wet work from warping. Ranger has posted one project with instructions for a Monoprint Card plus Distress Ink Tips. Pennywise Arts has a great online class on Monoprinting with Alcohol Inks.
The ATC, in the right hand image above, was created with the transparencies, Club Scrap 3/05 Road Trip White Paper, Club Stamp 5/05 Painted Desert Unmounted Stamps, Ranger Black Pigment Ink & Black Embossing Powder (the edges of the ATC are inked and embossed also), and ColorBox Ancient Page Harbor, Lime, & Neptune Inks. I applied inks to the paper by dripping reinkers, one color onto the papers at a time, onto a transparency and used the ColorBox Stylus to spread it out, then sandwiched a blank transparency on it and pressed unevenly. I then spritzed the side of the transparency that I was using with the Ranger Perfect Ink Refresher and laid the cardstock onto the damp transparency. I sandwiched the transparencies again and used a brayer to press the ink into the paper. I then repeated the process with the darker ink.
Basically you can press Ink Pads onto the craft sheet, drip and drizzle Reinkers on it, pounce ink on, smear glitter glue onto it, add Paints, drip or draw onto it with Alcohol Inks, dilute with Alcohol Blending Solution or even spritzes of water (for water based inks) and then take your intended project surface and press it onto the inks, swirl or swipe as you lift and marvel over the finished piece! You can also press portions of the Non Stick Craft Sheet onto itself before adding the inks to your project to get more of an ink blot effect! Glossy Paper is wonderful for this technique, but anything will do! The glossy surface just helps the ink travel and fills the paper better.In the ATC to the right and in the title image for this Blog entry, I used a combination of Ranger Alcohol Inks in Lettuce & Stonewashed, Ranger Alcohol Blending Solution, and Ranger Stickles in Waterfall to create a backdrop for the stamped scratch marks, frame, and focal image. On the ATC, I used also Ranger's Aqua Adirondack Paint Dabber, Adirondack Bottle, Lettuce, & Stonewashed Ink Pads, and Archival Cobalt & Teal Ink Pads as well as Club Scrap's Glossy Paper plus the 2/07 Refresh Kit's CSt UM Stamps, CSt WM Statue & Fern Collage Stamp, Dark Blue, Light Blue, Dark Green, and Light Green Papers.
The mattes in the layout below were created with Glossy Paper and Alcohol Inks using a combination of monoprinting and direct pouncing with Alcohol Inks. I dry embossed Tinkerbell with a Plaid Embossing Stencil. The papers are all Club Scrap, using the Mint Frost and Cream Frost from the 1/04 Asian Artisan Kit, and unfortunately unlabelled other CS papers. (I didn't post details in the past!)
Below is another sample made with alcohol ink monoprinting, as you can see in the upper right, eventually the colors will blend all the way, simply soak it up and add new inks! I misted rubbing alcohol onto the Glossy Paper and onto the craft mat, dripping Alcohol Inks at random. Then I laid the Glossy Paper face-down on the inked mat and swirled, swiped, and lifted. I used Club Scrap's 9/05 Science Unmounted Stamps, 7/05 Wings Apricot Paper, and Glossy Paper along with Ranger's Non Stick Craft Sheet, Adirondack Alcohol Inks in Butterscotch, Caramel, & Terra Cotta, and Adirondack Ink Pads in Butterscotch, Caramel, Rust, & Terra Cotta.
Below is the new logo for my tutorials at Diversity Designs! I applied small "spatters" of Ranger's Alcohol Inks in Bottle, Lettuce, and Stream to the Ranger Non-Stick Craft Mat, added the Alcohol Ink Blending Solution, then took Glossy Paper and pressed it onto the sheet, swirling and lifting until the paper was well covered. I added more ink and targeted the white areas. After the paper was filled with ink, I added a little Adirondack Metallic Mixatives in Copper to a felt applicator and pounced away! The black art work is a self portrait of me that was then altered by Roselyn!
Tim Holtz also teaches a version of this with his Distress Inks and calls it Wrinkle Free Distressing. With it, you will often spritz the craft sheet or your project material with water and then iron your finished piece to keep the wet work from warping. Ranger has posted one project with instructions for a Monoprint Card plus Distress Ink Tips. Pennywise Arts has a great online class on Monoprinting with Alcohol Inks.


1 comment:
Amazing things with ink!
Post a Comment